Image layout
This page is about an appealing image layout. Here I give some tips on how to split an image so that the content is placed as interesting and dynamic as possible.
Golden section
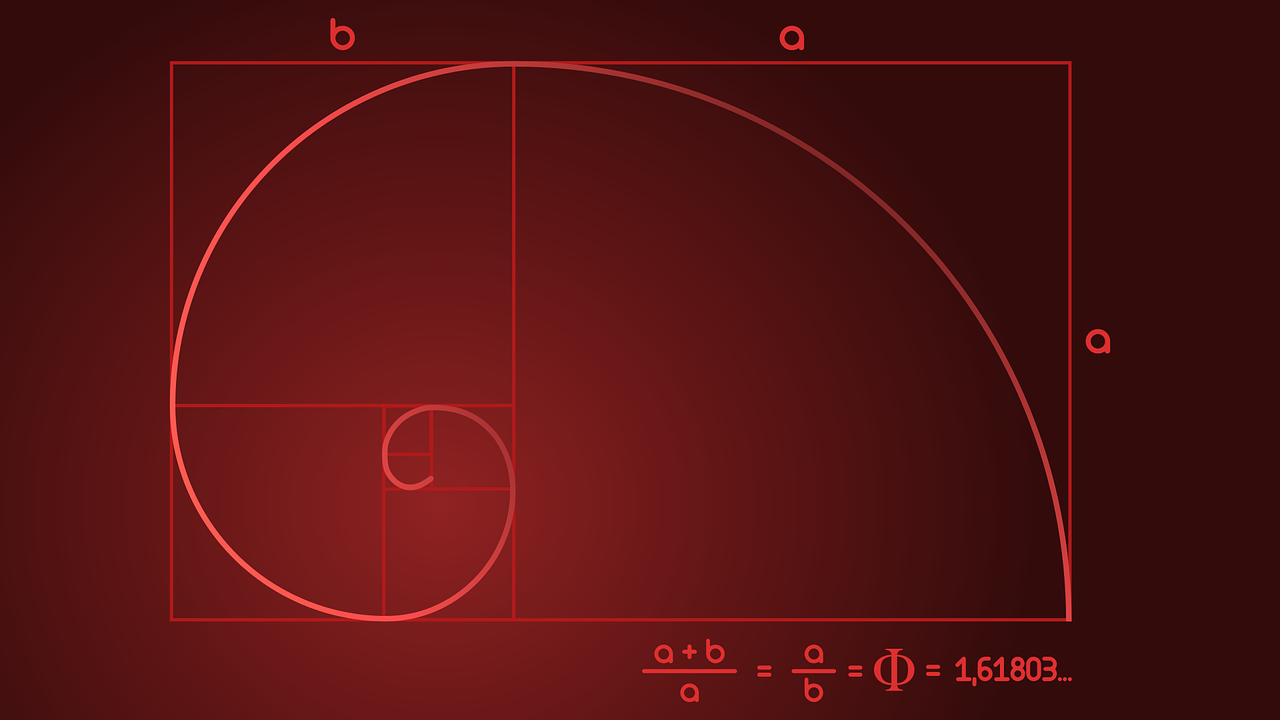
The Golden Ratio is used to divide surfaces, and is therefore one of the most basic ways to make pictures or other surfaces visually appealing. You divide the area in the size ratio 3:5 or 5:8 – 8:13 – 13:21 and so on. (the smaller number is added to the larger, the larger is then the smaller number).
That is, if you have an area, for example, in the size of 80cm:160cm, you divide it into 30cm:50cm and 60cm:100cm. The golden ratio is most often used when creating a poster, because this division creates both calm and tension. It is clearly structured and easily recognizable.
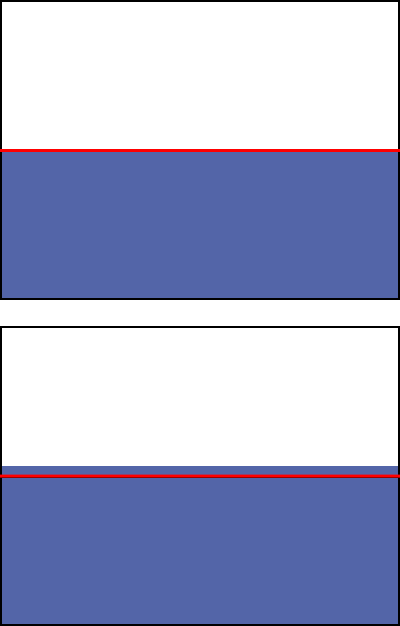
The image division in the Golden Section does not necessarily require that you calculate. Imagine a DIN A4 sheet, this is divided into 3 parts of 5 parts (so one side is a little smaller than half, the other a little larger). You can also calculate 3 plus 5; this is then 8 of which half is 4.
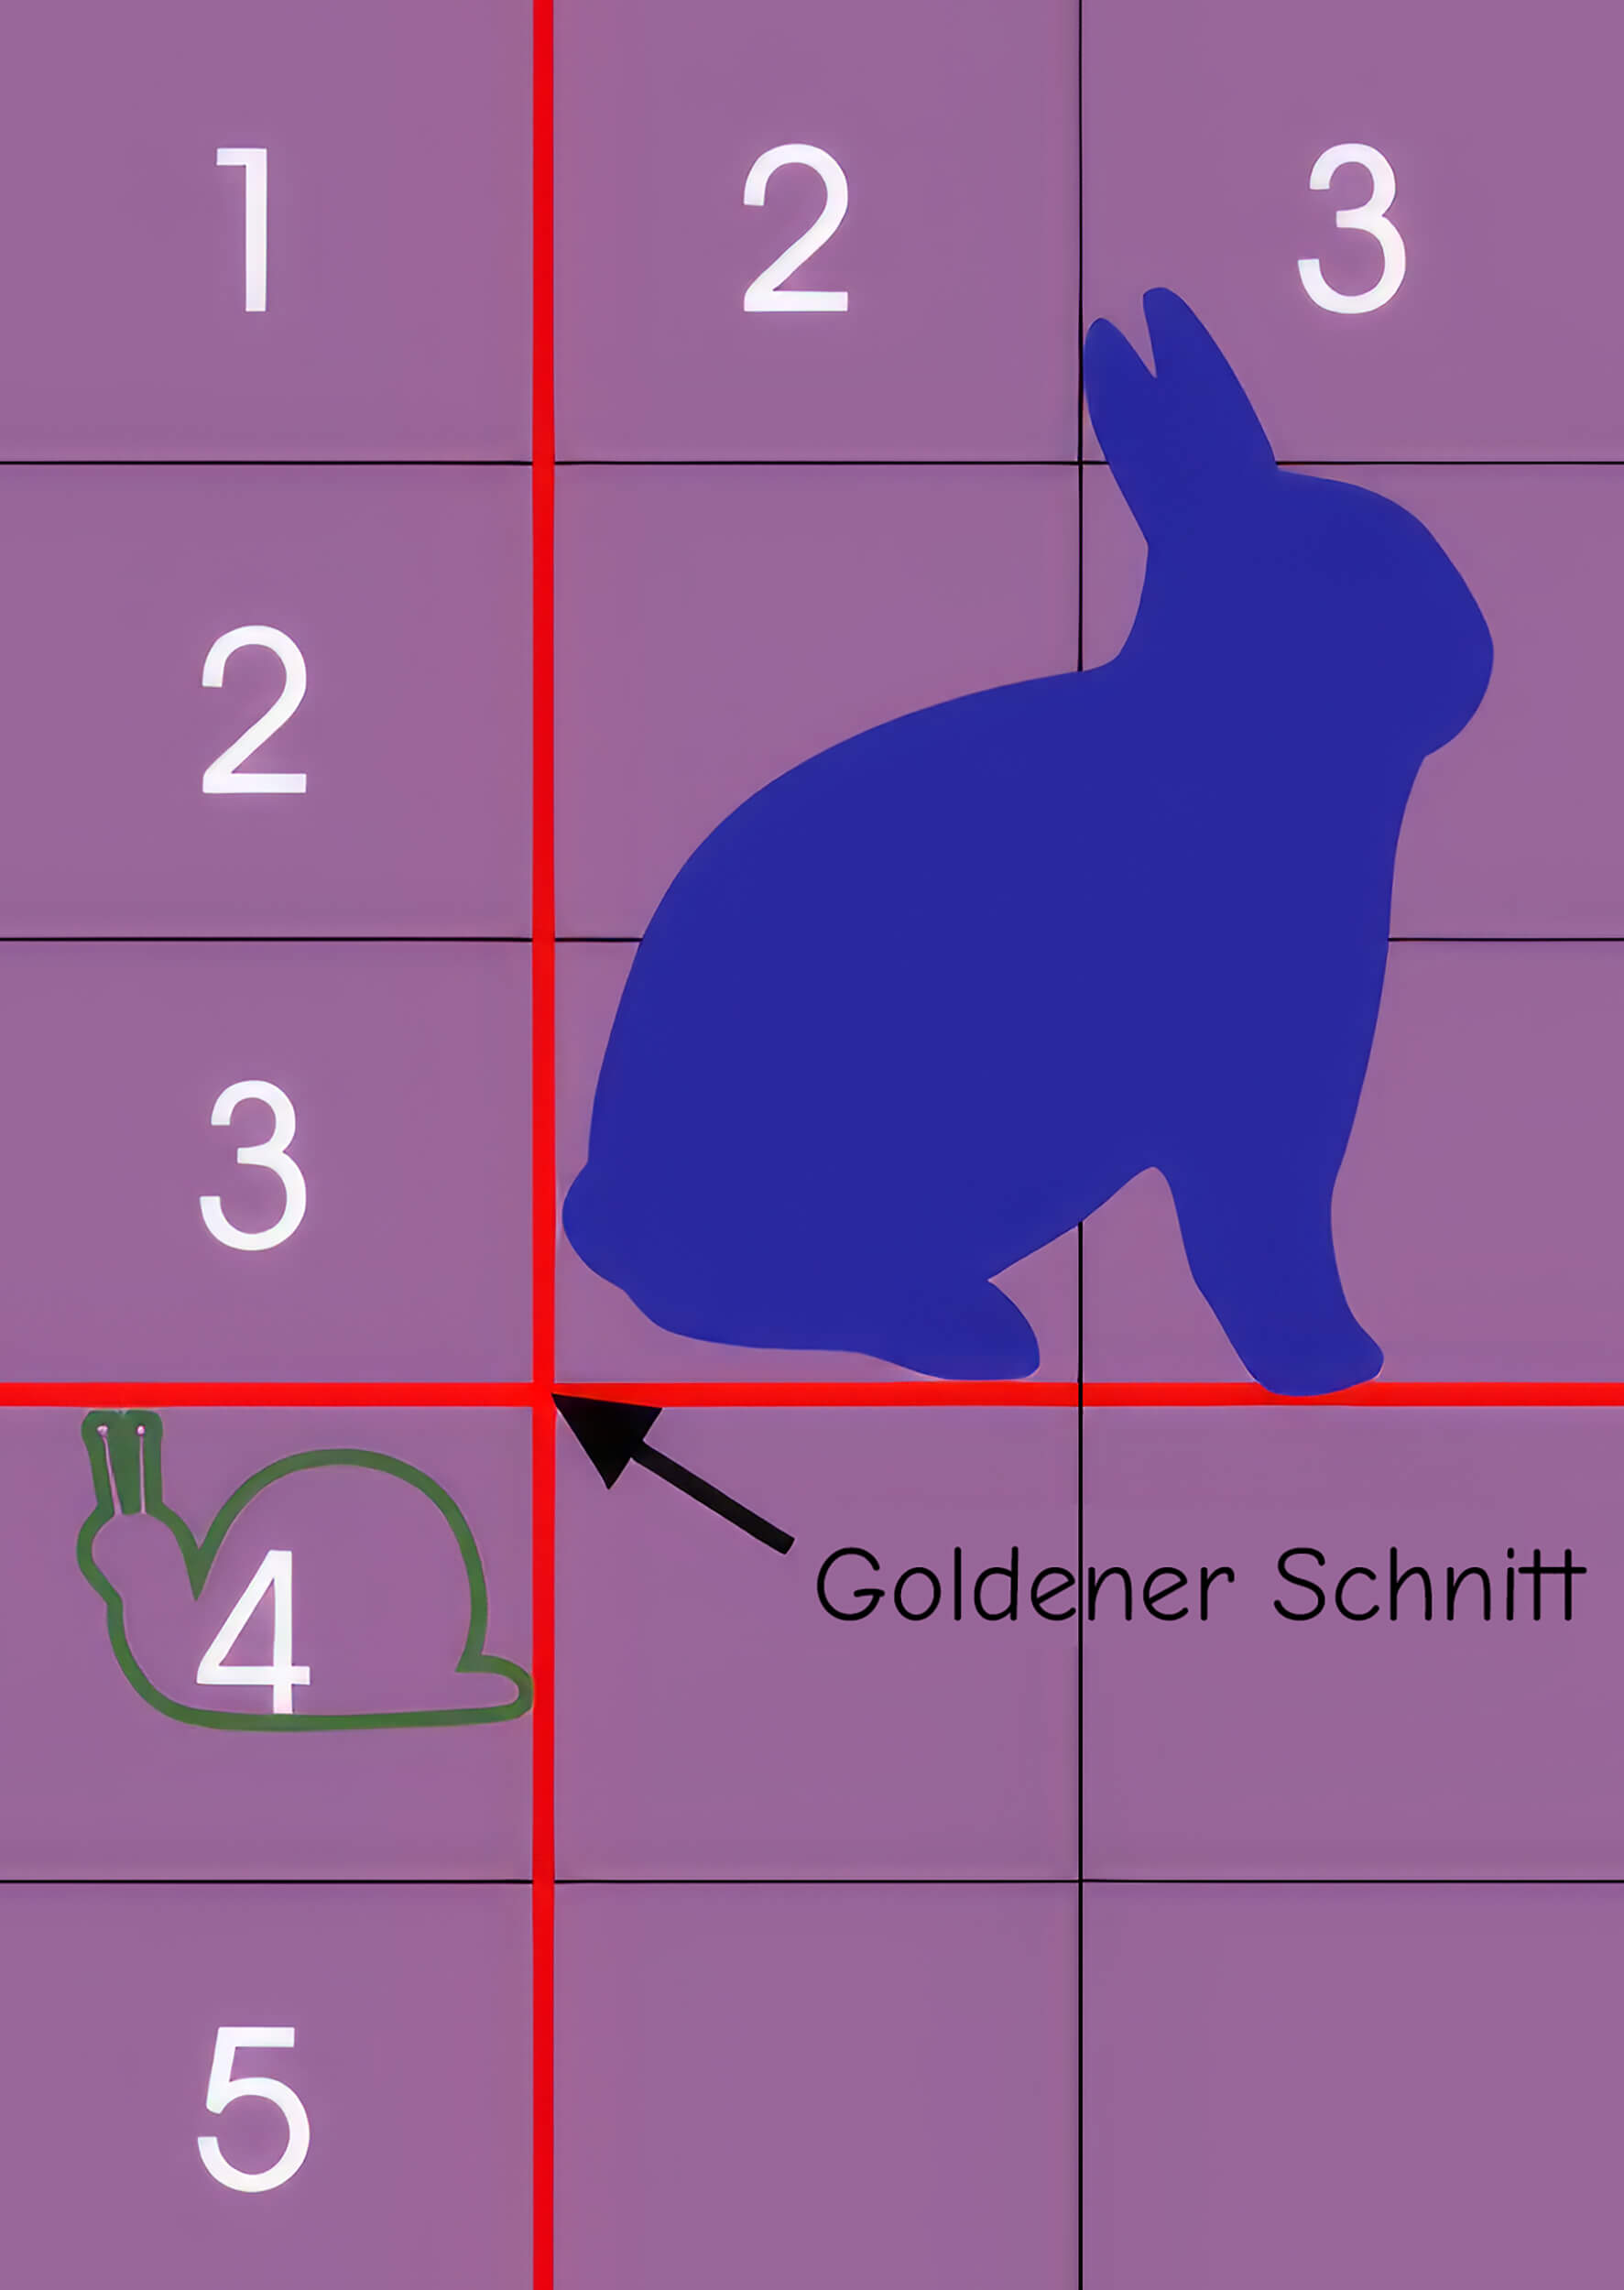
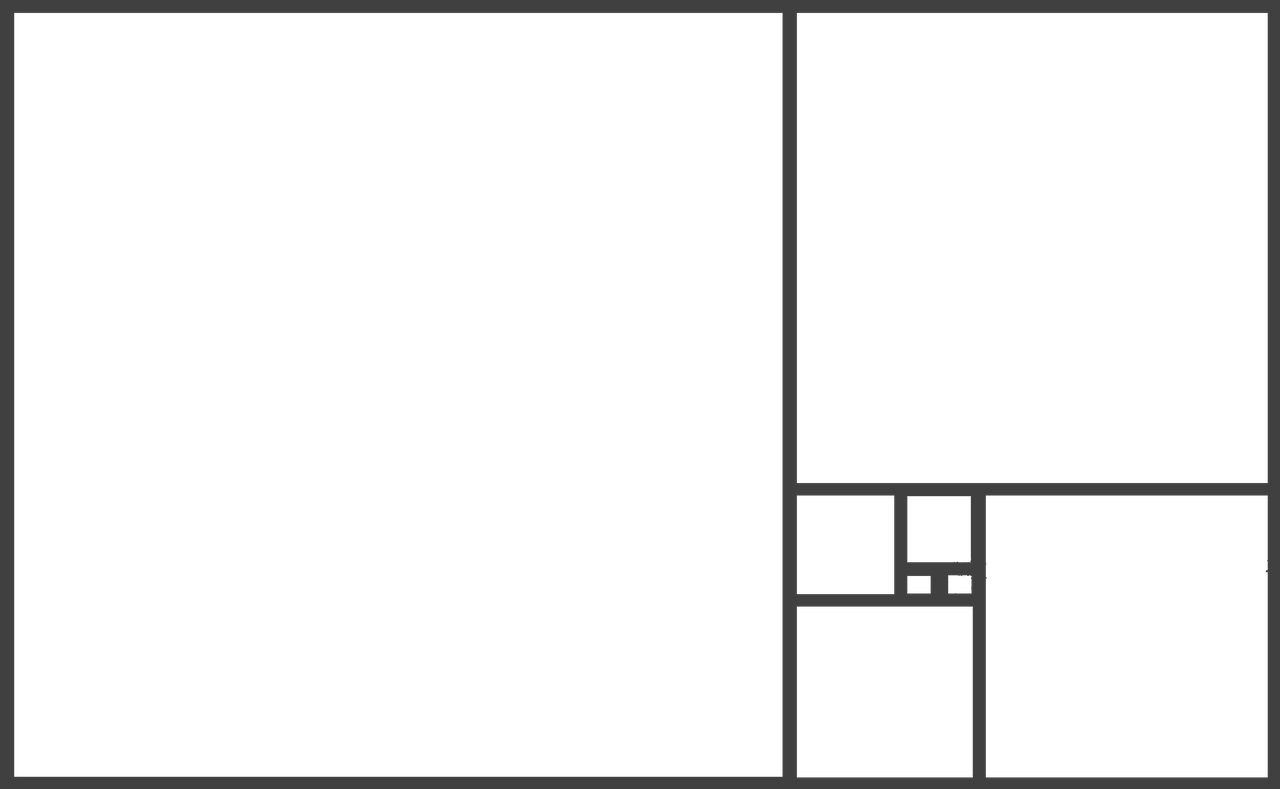
If you would divide the sheet into several equal parts, the golden ratio would be either 3 or 5 parts (in the example 2:3 – red lines in the picture above). Objects placed at this point are therefore in the golden ratio (either above it like the blue rabbit, or below it like the green snail). However, objects can also be placed on the other sides of the red line. This then appears dynamically unbalanced (since it is not absolute symmetry; the motifs do not lie in the exact center of the sheet).
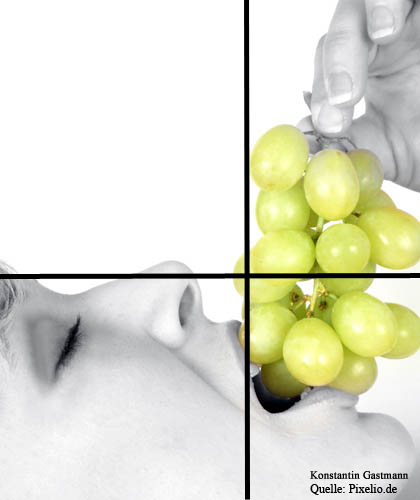
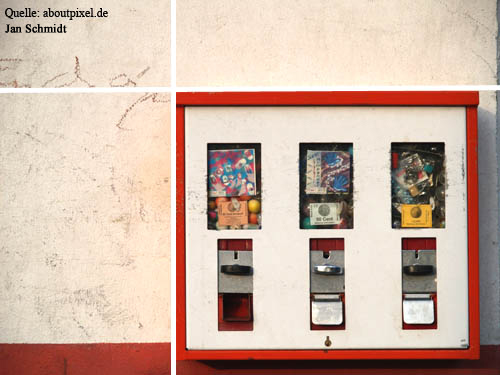
Examples of the golden section
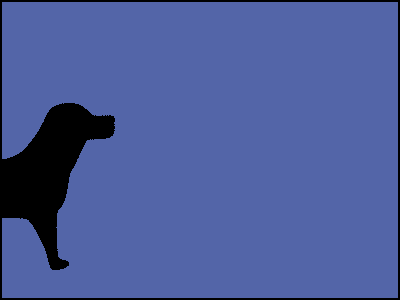
Place in the gate
If you place a motif on the edge of the page so that even a part of the image falls away, it is in the bleed.
The viewer “imagines” the missing part of the image – this stimulates the viewer’s imagination and makes the motif look more interesting.

Optical middle
If you place a motif horizontally exactly in the center of the image, it looks to the viewer as if it is falling down. To counteract this optical illusion of the subject being placed too far down, place the subject at the height of the optical center.


The optical center sits a little bit (e.g. 1/3 or 1/4) higher than the actual center. The subject is much calmer and more balanced there – the viewer does not get the disturbing feeling that the subject is too far down.
Parallel set
If you want to show spatial depth, it is recommended to arrange your subjects parallel to each other. The object behind is usually smaller.
More tips for image splitting
And there is the possibility to arrange something pyramid-shaped (so to speak, one of the basic rules for picturing). To do this, you place the larger objects in the back and let them gradually become smaller towards the front – always towards the viewer. This is also commonly used in still life.
Then, of course, there’s the classic – putting everything in a row.
Scattering is also popular, but it looks very chaotic and disordered. Then you can place something opposite. If it also runs parallel towards a vanishing point, it creates even more tension and space (where you place the vanishing point is again an interesting possibility that you can vary).
And then placing things side by side and sorted by size. Of course, it always looks different on which side the larger object is and on which side the smaller one is.
Especially for decorations, background or foreground design, and overall details, these tips are not uninteresting for making an image more interesting and dynamic.
More Pages
- Color Theory and Harmonious Color Design
- Design Principles
- Black and White Pictures
- Optical Illusion
- Image Analysis
From the German Blog
- One Image in Many Colors
- Easily Recolor Photos with Selective Color Correction
- Long-Term Test: Lightfastness of Felt-tip Pens, Colored Pencils, Markers, and More