Spatial drawing
Räumliches Zeichnen ist die Grundlage für eine dreidimensionale Wirkung innerhalb eines Bildes. Wer nicht einen flachen Eindruck vermitteln möchte, sondern von Tiefe und Weite, findet hier die wesentlichen Mittel und Merkmale, wie ihm das gelingen kann. 😉
Shading
There are many reasons why an image appears spatial. Here you will learn what they are and how to use them.
Spatial drawing is commonly used in technical drawings and in architecture. However, a spatially structured image also has its appeal and noticeable advantages. Here, I will show you how to draw in a spatial manner and what it depends on. You can also learn shading here.
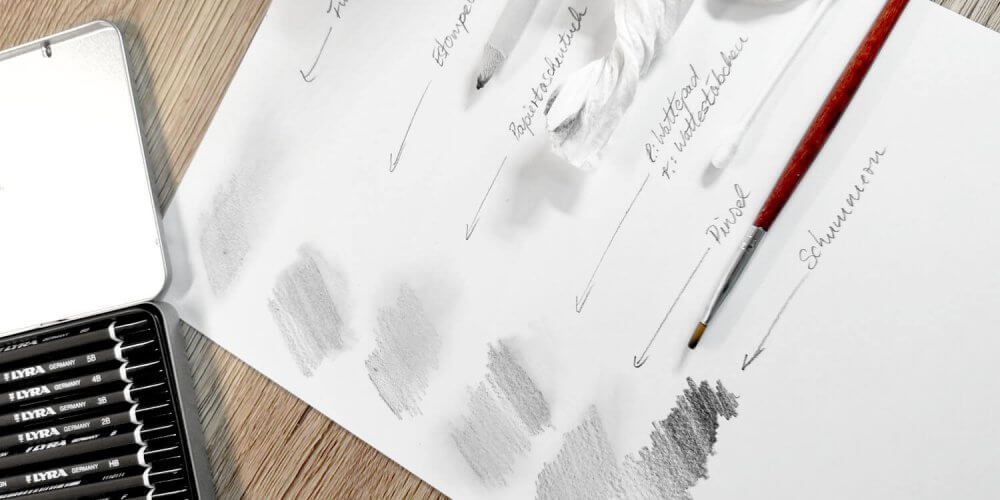 Shading and Blending with Pencil – Read the blog article
Hatching
Below you will find the basic hatching techniques using a pencil or fineliner:
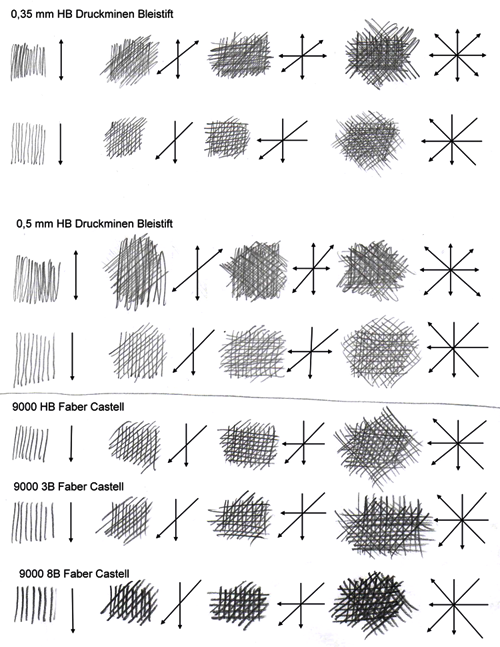
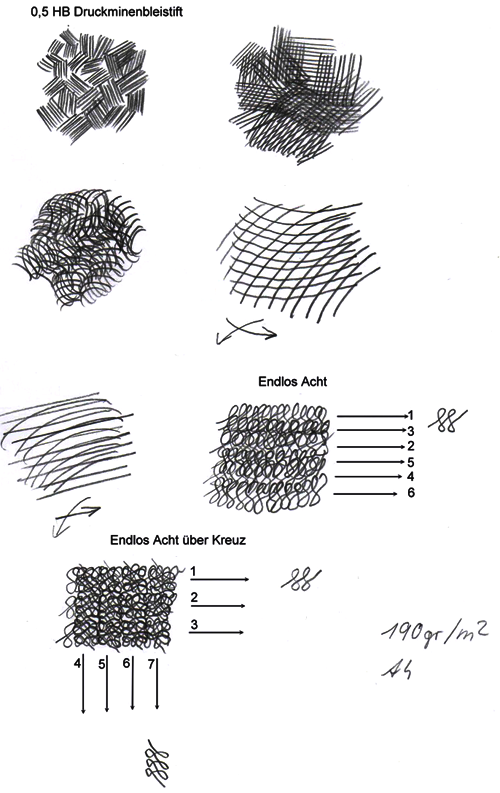
When you look at, for example, a chair, you initially see the chair as a whole. But you need to learn to see because, for an artist, it consists of lines at first.
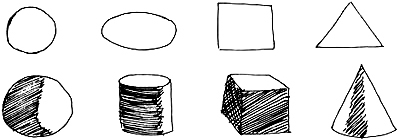
To do this, you use four basic shapes: circle, oval, square, and triangle. In combination with the three-dimensional, you have many possibilities to depict complex objects in an easy way.
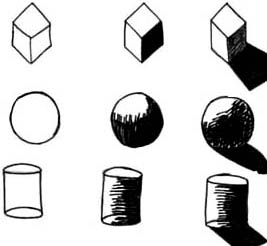
Three-dimensional/ spatial forms
- Circle – Sphere
- Triangle – Pyramid
- Square/ Rectangle – Cube
In the case of the chair, you first draw a cube and then a square above it. You can transfer this simplification to all possible objects.
Very simple: e.g. an apple = circle.
For trees, you could take a cone or a sphere, depending on the species, the trunk would then be a cylinder.
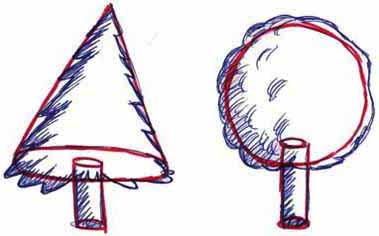
When looking at children’s drawings, you can see that even they already make use of these aids by simplifying what they see. To understand which shape can be used where, one must learn to imagine an object in a simplified manner. The best way to do this is by memorizing simple motifs and reproducing them on paper from memory.
Spatial Drawing – Space
The effect of lines can also be expressed differently. If you imagine a surface with a simple spiral on it, you will see that it appears calm and even. However, if you shift the line, it creates unrest and tension.
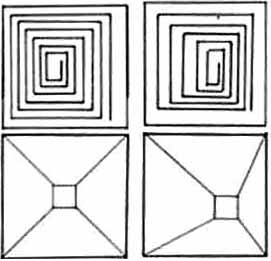
On another surface with several shapes that are initially calm and balanced, you can also create tension and depth through proportional shifts. In this case, only the middle part has been shifted, but the size has not changed. This technique can also be used in landscape pictures to create tension, as shown in the example of the tree where the horizon line is responsible for the effect.
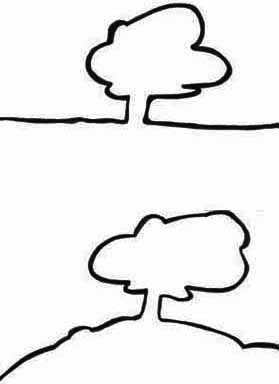
To represent space on a two-dimensional sheet, you can use some clever tricks: The simplest method is to draw a horizontal line across the sheet. It is even possible to draw multiple horizontals overlapping each other. The distance to the subject also plays a crucial role.
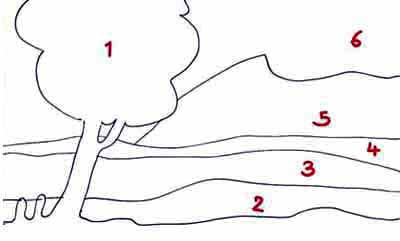
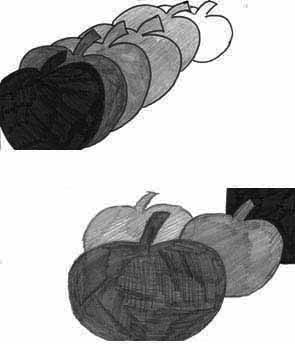
When you want to depict multiple objects, such as apples, in a three-dimensional way, you can either arrange them in layers, meaning placing them one after another, or assemble them arbitrarily. In this variation, it is helpful to initially draw invisible lines, which makes it easier. Naturally, when drawing several objects of the same size, the ones in the back are smaller than the ones in the front. However, this only applies to objects of different sizes to a limited extent.
The Key Features of Spatiality
Here is a summary of the possibilities for drawing in a spatial manner:
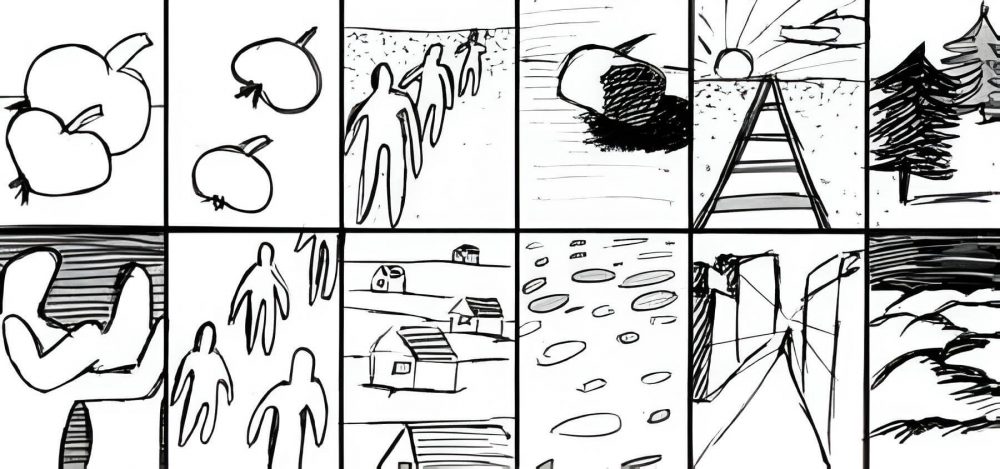
- Using or suggesting the horizon line
- Overlaps
- Darkening the background to create contrast
- The foreground is usually at the bottom of the picture
- Surface textures change as they recede (they become blurrier)
- Aerial perspective is common in landscape photos
- There is also the “bluing” effect (colors become increasingly blue) of the background
- Objects become smaller as they recede
- Shadows give shape to the object
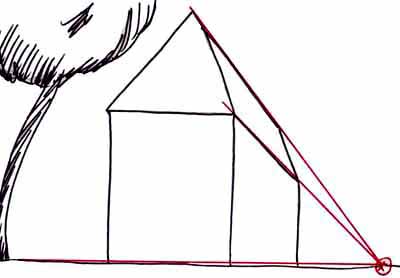
- Parallel lines that recede into the distance converge towards a vanishing point
- Color contrasts and brightness contrasts decrease with distance
Additional Pages
From the German Blog
- Bluing effect of the background: a feature of spatiality
- What geometry reveals about you
- Creating a tilt-shift or miniature effect in Photoshop
