Learning to draw eyes – the basics
The eyes are the most important and exciting element of the face. They are considered a mirror to the soul and can show emotions very subtly, but also very clearly. This is why eye drawing is one of the most important disciplines.

Anatomy: Structure of the eye
The eye consists of several important areas that you should know when drawing in order to be able to build an eye without a model:

- Eyebrows: A slightly curved arch of individual hairs that bring a lot of expression to the face.
- Eyelid (upper/lower eyelid): Shape and volume define expression and depth.
- Eyelid crease: Shows depth and eye shape, soft shading instead of harsh lines.
- Eyelashes: In a natural curve and direction, do not set evenly.
- Iris & pupil: With light reflex for liveliness. Eye color and pattern of the iris provide variance.
- Lacrimal sac / lacrimal point: Part of the tear ducts leading to the nose. Can be swollen or sunken and cause corresponding shading.
- Lacrimal groove (waterline): Subtle shadow below the inner corner of the eye; important for realistic aging and expression.
- Corner of the eye: Soft on the inside, pointed on the outside.

Pupil and iris
When drawing the iris and pupil, it is important to pay attention to structure, light reflections and depth effect.
The iris is not simply a flat, monochrome disc. It shows fine radial lines, concentric rings and often a lively play of colors, which can be indicated by delicate hatching or glazing.
The pupil, on the other hand, is always deep black and is located in the center of the iris. A deliberately placed light reflex, which can run across both the iris and the pupil, lends the eye expression and liveliness.

The grain of the iris can be depicted in pencil using regular and irregular shapes, alternating with shades of varying darkness.
Eye colors
Eye colors play an important role in eye drawing because they not only color the iris, but also convey expression and mood.
Brown eyes often appear warm and intense, blue eyes radiate coolness and clarity, green eyes lend a figure something mysterious, while hazel eyes appear particularly lively due to their mixture of brown and green.

The pattern of the iris can be shown in combination with different shades.
Overview of eye colors
A variety of eye colors such as brown, blue, green, grey, hazel or amber can be used when drawing to give each figure individual expression and character.
| Eye Color | Description | Worldwide Frequency | Color Sample |
|---|---|---|---|
| Brown | Most common color, from light to very dark | approx. 79% | |
| Blue | Low melanin, typical in Northern Europe | approx. 8–10% | |
| Green | Rare, mix of yellowish and blue pigments | approx. 2% | |
| Gray | Variant of blue, more densely structured | approx. 2–3% | |
| Hazel | Mix of brown and green, often with golden flecks | approx. 5% | |
| Amber | Pure, bright yellow-gold | very rare (<1%) | |
| Heterochromia | Two different colors in one person | extremely rare (<1%) |
Eyelashes
Eyelashes, like eyebrows, protect the eye and are therefore an important part of the eye and its appearance.
Drawing eyelashes requires good observation and some practice. Eyelashes are never straight lines, but slightly curved, often irregularly arranged hairs that gently taper outwards.
In women, they are usually longer, thicker and more curved, often emphasized by mascara or artificial extensions. Men’s eyelashes are usually somewhat shorter, stronger and straighter, but still thick. Children’s lashes are particularly delicate, thin and more finely distributed, which gives the look a soft, innocent effect.
When drawing, you should pay attention to the direction of growth, length and thickness, taking into account the differences between the upper and lower eyelid and not making the lines too even so that the result looks natural.

The individual eyelash hairs are thickest directly on the eye and become thinner towards the outside.
Eye shapes
Different eye shapes give faces very different effects and are an important feature in portrait drawing.
There are round, almond-shaped, narrow, deep-set or protruding as well as slightly drooping or upturned eyes. The shape is determined by the eyelid crease, the position of the eyelids, the distance between the eyes and the ratio of upper to lower eyelid.
When drawing, it helps to consciously observe these details, as they contribute greatly to the personality and facial expressions of a face.
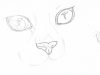
Asian eyes
When drawing Asian eyes, it is important to note the basic almond shape and, where applicable, the characteristic crescent or Mongolian fold (epicanthus medialis) that covers the inner corner of the eye.

Drawing eyes step by step
Drawing eyes is very easy, even the different angles are not a big problem. They are an essential part of the expressiveness of the face and should therefore be drawn carefully.

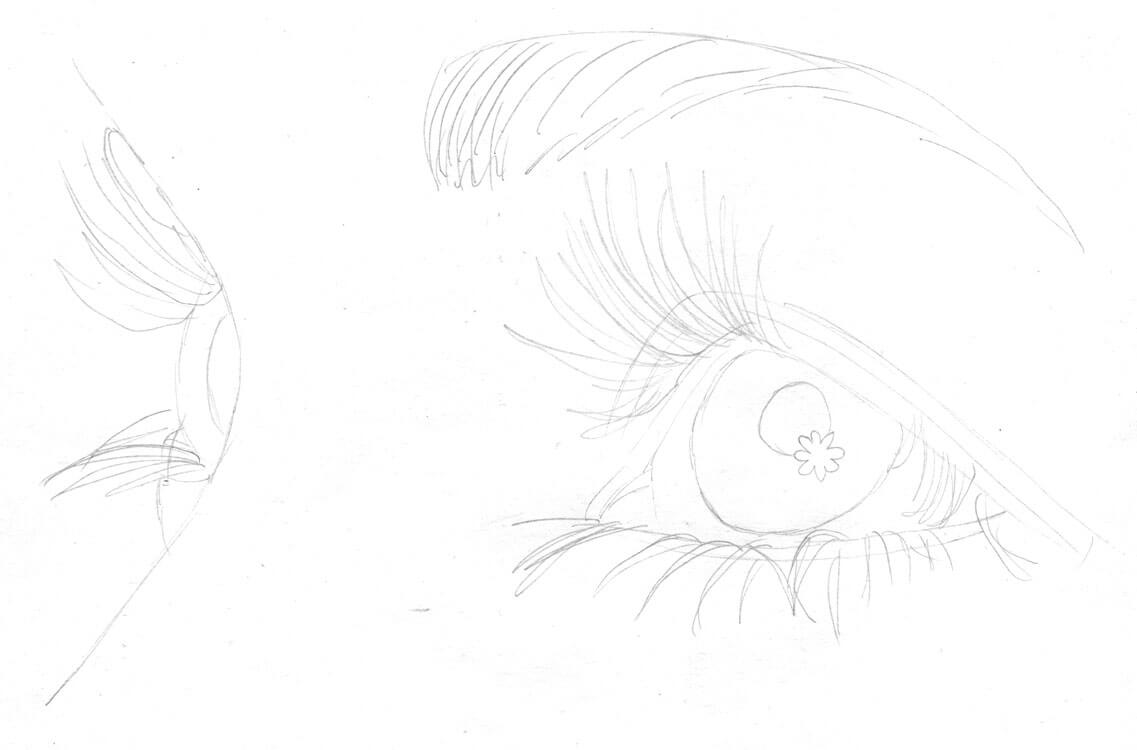
This pencil sketch shows two views of an eye side by side:
- on the left a realistic eye from the front, rich in detail with fine shading, iridescent light reflection and emphasized eyelashes
- on the right an eye in profile, embedded in the facial contours with nose, eyelids and eyebrow
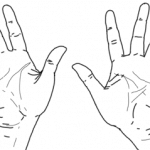
The pupil in different viewing directions
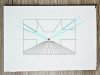
The example below shows how the pupil of the eye moves when a person looks upwards, downwards or sideways.
This clear fineliner illustration shows schematic contours of an eye with pupil in different viewing directions. Simple geometric shapes are used in a matrix arrangement to visualize how the iris and pupil move within the eye – upwards, downwards, sideways or straight ahead. The black shapes of the pupil are shown on the left and the corresponding eye shapes next to them, which illustrate how the relationship between the white of the eye, eyelid and iris changes depending on the direction of gaze. This minimalist illustration is ideal for studying the basics of eye tracking.

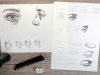
Step-by-step to a realistic eye: pencil tutorial with increasing level of detail
This pencil sketch shows a clear step-by-step tutorial on how to draw a realistic human eye.

Starting at the top left with the rough contours of the eye shape and the placement of the iris, the image develops in several stages. Details such as eyelid lines, pupil, light reflections and eyebrows follow, until finally a fully shaded and detailed eye can be seen at the bottom. The drawing not only introduces the basic technical lines, but also demonstrates the transition from simple strokes to realistic depth and expressiveness.
Eye in profile: step by step to a realistic sketch
This pencil sketch shows a clear step-by-step tutorial on how to draw an eye in profile.

On the far left, the instructions begin with simple guide lines that define the rough shape and alignment of the eye. In the next step, the eyelid lines and the basic shape of the eyeball are added. Further to the right, details such as the iris, pupil, eyelashes and eyebrow appear, until finally, on the far right, a fully developed, shaded eye can be seen. The drawing beautifully conveys how a realistic eye can be created from a simple framework through precise details and skillful shading.
5 steps to a realistic eye: pencil tutorial
This pencil sketch shows a clear step-by-step tutorial on how to draw a realistic eye.
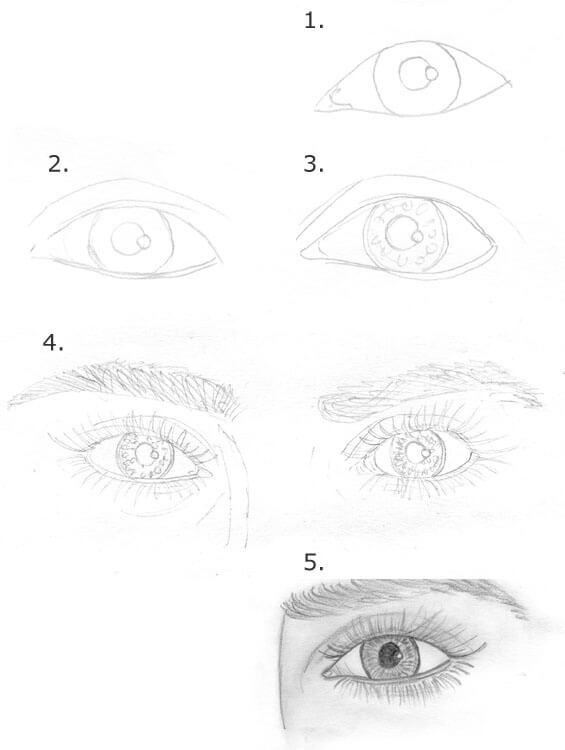
In five numbered steps, the drawing is developed from the rough basic shape (step 1) to the precise placement of the iris, pupil and eyelids (steps 2-3), added details such as eyelashes and eyebrows (step 4) to the fully finished, shaded and vibrant final version (step 5). The sketch illustrates the importance of progressing from simple lines and shapes to complex, finely graduated details to achieve depth and expression.
Facial expressions and emotions
Eyes are crucial for facial expressions and emotions because they express subtle signals such as joy, sadness, surprise or doubt and often reveal more than words.
If you want to delve deeper into emotional facial expressions, you can find more examples and tips on another page.
Drawing a laughing eye from the front
This pencil sketch shows a step-by-step tutorial on how to draw a laughing eye from the front, conveying emotion and expression.

The drawing begins with simple lines and contours for the eye shape and gradually develops further: eyelashes, eyelid creases and eyebrow are added before fine shading, wrinkles and details finally emphasize the characteristic smile in the corners of the eyes. The end result shows an eye that appears lively and emotional thanks to its lines and shading – a beautiful example of how subtle details make facial expressions visible.
Drawing a smiling eye in profile
This pencil sketch shows a step-by-step tutorial on how to draw a laughing eye in profile – focusing on capturing emotion and expression.

The sequence begins at the top with a rough outline of the closed eyelid and develops in several stages: eyelid creases, eyelashes and eyebrows are added until finally the characteristic smile lines and shading can be seen at the bottom. The result conveys the excitement and joy that appears around a squinted, smiling eye – ideal for studying facial expressions.
More Pages
From the German Blog
- Draw and Paint Colored Pencil Portrait
- Paint Portrait with Colored Pencil
- Draw Portrait of Afro Woman with Colored Pencil
- Draw Girl with Cola Bottle with Colored Pencil
- Girl Leaning Head on Hand – Draw with Colored Pencils
- Blending and Shading with Pencil
- Drawing Technique: Learn to Draw with Grid